Product Overview
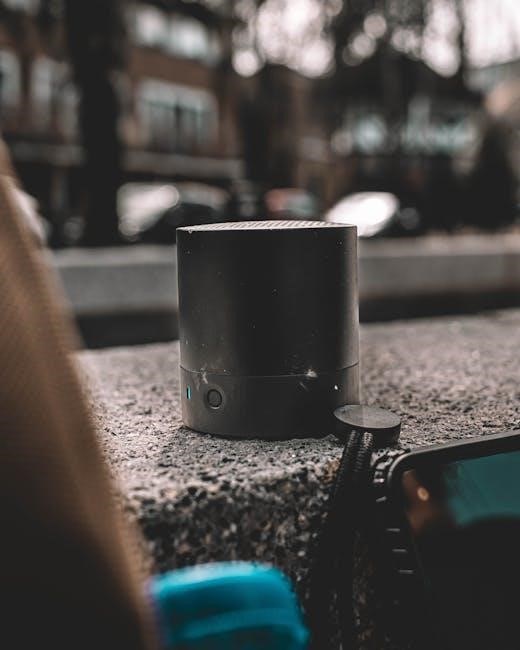
The Vivitar Bluetooth Speaker offers high-quality wireless sound‚ long-lasting battery life‚ and compatibility with various devices. It supports Bluetooth‚ FM radio‚ and AUX input for versatile music playback.
1.1 Key Features of the Vivitar Bluetooth Speaker
The Vivitar Bluetooth Speaker features high-quality wireless audio‚ Bluetooth 4.2 EDR with A2DP and AVRCP profiles‚ and a rechargeable lithium-ion battery offering up to 15 hours of playtime. It includes an FM radio‚ USB‚ AUX‚ and Bluetooth modes‚ ensuring versatile music playback. Compatible with iOS‚ Android‚ and other devices‚ this lightweight‚ portable speaker delivers crystal-clear sound for an enhanced listening experience.
1.2 Package Contents
The package includes the Vivitar Bluetooth Speaker‚ a USB charging cable‚ an AUX input cable‚ and a user manual with warranty information. These items ensure you have everything needed to start using your speaker right out of the box.
1.3 Compatible Devices
The Vivitar Bluetooth Speaker is compatible with most smartphones‚ tablets‚ iPhones‚ iPads‚ iPods‚ and other Bluetooth-enabled devices. It supports Bluetooth V4.2 with A2DP and AVRCP profiles‚ ensuring seamless connectivity for streaming music and hands-free calls up to 33 feet away.
Safety Precautions
Always follow basic safety precautions: avoid using near water‚ ensure a dry environment‚ and prevent exposure to extreme temperatures to maintain optimal performance and longevity.
2.1 Important Safety Instructions
Read all instructions carefully before using the speaker. Keep it away from water and avoid exposure to extreme temperatures. Ensure the speaker is placed on a stable‚ dry surface. Never submerge it in water or use it in humid environments. Follow charging guidelines to prevent battery damage. Avoid using damaged cables or adapters.
2.2 Proper Handling and Maintenance
Properly clean the speaker with a soft cloth and avoid moisture exposure. Store it in a cool‚ dry place‚ away from direct sunlight. Handle the device with care to prevent damage. Avoid extreme temperatures and ensure it is dry before use. Regularly inspect cables and ports. Proper charging practices help maintain battery health and ensure optimal performance.
2.3 Avoiding Damage to the Speaker
Avoid exposing the speaker to water or extreme humidity; Use a soft cloth to clean it and prevent dust buildup. Keep it away from direct sunlight and extreme temperatures. Avoid dropping or applying heavy pressure. Use the provided charger to prevent battery damage. Store the speaker in a protective case when not in use to maintain its condition and longevity.
Charging the Speaker
The Vivitar Bluetooth Speaker features a built-in rechargeable battery. Use the provided USB cable for charging. The speaker fully charges in about 5 hours and the red indicator light turns off when charging is complete.
3.1 How to Charge the Speaker
To charge the Vivitar Bluetooth Speaker‚ locate the Micro-USB port on the rear. Insert the provided USB cable into this port and connect the other end to a USB charger or computer. Plug the charger into a power outlet. The red LED indicator will light up‚ signaling the charging process. Charging typically takes 5 hours for a full charge.
3.2 Charging Time and Battery Life
The Vivitar Bluetooth Speaker charges fully in approximately 5 hours; It features a 1200 mAh lithium-ion battery‚ providing up to 15 hours of playtime at moderate volume levels. Battery life may vary depending on usage and volume settings. The speaker is designed for reliable‚ long-lasting performance‚ ensuring extended music enjoyment on a single charge.
3.3 Indicator Lights and Charging Status
The speaker features indicator lights to show charging status. A red light indicates charging‚ turning off when fully charged. When the battery is low‚ the speaker beeps every 30 seconds. Ensure the speaker is charged before extended use for optimal performance.
Pairing the Speaker
Pairing the Vivitar speaker is straightforward. Turn it on‚ enter pairing mode‚ and connect via Bluetooth settings on your device. Ensure Bluetooth is enabled for a secure connection.
4.1 Pairing with Android Devices
To pair your Vivitar Bluetooth speaker with an Android device‚ enable Bluetooth in your phone’s settings. Locate the speaker under available devices‚ and select it to initiate pairing. Once connected‚ a confirmation message will appear. Ensure the speaker is in pairing mode for a seamless connection. If prompted‚ confirm the pairing request on your device.
4.2 Pairing with iOS Devices
To pair your Vivitar Bluetooth speaker with an iOS device‚ go to your iPhone’s Settings app and select Bluetooth. Enable Bluetooth and locate the speaker in the available devices list. Tap the speaker’s name to connect. If prompted‚ confirm the pairing on your iPhone. The speaker will automatically pair‚ and a confirmation message will appear once connected. The device will remember the speaker for future connections.
4.3 Troubleshooting Pairing Issues
If pairing fails‚ restart both the speaker and your device. Ensure Bluetooth is enabled on your device and the speaker is in pairing mode. Check for device compatibility and update your device’s Bluetooth settings. If issues persist‚ reset the speaker by pressing and holding the power button for 10 seconds. This will restore default settings‚ resolving common pairing problems and ensuring proper connectivity.

Operating the Speaker
Adjust volume using the controls on the speaker or your connected device. The speaker features indicator lights for mode confirmation and battery status‚ ensuring seamless operation across Bluetooth‚ FM radio‚ and AUX modes for a dynamic listening experience.
5.1 Volume Control and Playback Options
The Vivitar Bluetooth Speaker features intuitive volume controls located on the speaker’s side panel. Users can adjust the volume using either the speaker’s buttons or the connected device’s controls. Playback options include playing‚ pausing‚ and skipping tracks using the speaker’s buttons. The speaker also supports hands-free calling‚ allowing users to answer or reject calls directly from the device. The volume control ensures a balanced sound output‚ and the playback options provide a seamless listening experience across various modes‚ including Bluetooth‚ FM radio‚ and AUX input. Additionally‚ the speaker’s indicator lights provide visual feedback for volume levels and playback status‚ enhancing user convenience. The design ensures that users can easily manage their audio preferences without needing to access their paired devices frequently. This functionality makes the Vivitar Bluetooth Speaker a versatile and user-friendly audio solution for different environments and preferences.
5.2 Understanding the Indicator Lights
The Vivitar Bluetooth Speaker features indicator lights that provide essential status updates. A red light indicates charging‚ turning off when fully charged. A steady blue light confirms successful Bluetooth pairing‚ while a flashing blue light signals pairing mode. These indicators help users monitor the speaker’s status‚ such as power‚ connectivity‚ and charging progress‚ ensuring optimal operation without constant device checking.
5.3 Switching Between Different Modes
The Vivitar Bluetooth Speaker allows seamless switching between modes using the Mode/Pair button. Pressing the button cycles through Bluetooth‚ FM Radio‚ and AUX modes. In Bluetooth mode‚ the speaker searches for nearby devices to pair. FM Radio mode enables tuning into local stations‚ while AUX mode connects to external devices via the 3.5mm input. Each mode ensures versatile music playback options tailored to your preference.
Advanced Features
The Vivitar Bluetooth Speaker features advanced options like built-in FM radio‚ AUX input for wired connections‚ and a USB port for playing music from external devices.
6.1 Using the Built-in FM Radio
To use the FM radio‚ press the Mode button until the FM option is selected. Tune into stations using the +/- buttons. Save favorites by holding the preset button. Ensure the speaker is away from interference for optimal reception. The built-in antenna provides clear sound without needing external devices.
6.2 Connecting via AUX Input
Locate the AUX port on your Vivitar speaker. Use a 3.5mm audio cable to connect the speaker to your device. Plug one end into the speaker’s AUX input and the other into your device’s headphone jack. Select the AUX mode using the Mode button. Ensure the connection is secure for uninterrupted audio playback. Adjust the volume as needed for optimal sound quality.
6.3 Using the USB Port for Music Playback
Insert a USB drive into the speaker’s USB port. The speaker will automatically detect and play the music. Use the control buttons to navigate through tracks. Ensure your files are in compatible formats like MP3. This feature allows you to enjoy your music without needing Bluetooth connectivity‚ providing an alternative way to play your favorite songs effortlessly.
Warranty and Support
Your Vivitar Bluetooth Speaker is backed by a limited warranty. For service‚ contact Vivitar support with your proof of purchase. Visit www.vivitar.com for assistance.
7.1 Warranty Period and Coverage
The Vivitar Bluetooth Speaker is covered by a one-year limited warranty from the date of purchase. This warranty covers manufacturing defects in materials and workmanship. For details‚ refer to the warranty section in your user manual or contact Vivitar customer support directly for assistance and service center locations. Proper registration may be required.
7.2 Registering Your Product
To register your Vivitar Bluetooth Speaker‚ visit the official Vivitar website and navigate to the product registration page. Provide your product’s model number‚ serial number‚ and purchase details. Registration ensures warranty validation‚ access to exclusive updates‚ and priority customer support. Keep your proof of purchase handy for a smooth process.
7.3 Contacting Customer Support
For assistance with your Vivitar Bluetooth Speaker‚ contact customer support by calling 1-800-592-9541 or visiting www.vivitar.com. Provide your product details and issue description for prompt service. You can also submit inquiries via the website’s contact form or refer to the user manual for troubleshooting guidance. Support is available to address warranty claims and technical issues.
Troubleshooting Common Issues
This section provides solutions for common problems like no sound‚ low volume‚ Bluetooth connection issues‚ and battery charging problems‚ ensuring optimal speaker performance.
8.1 No Sound or Low Volume
If your speaker produces no sound or low volume‚ ensure the volume is turned up on both the speaker and connected device. Check Bluetooth connection stability‚ restart the speaker‚ and confirm the device is playing audio. If issues persist‚ reset the speaker by pressing and holding the power button for 10 seconds.
8.2 Bluetooth Connection Problems
If experiencing Bluetooth connection issues‚ restart both the speaker and device. Ensure they are within 33 feet range. Disable Bluetooth on other nearby devices. Re-pair the speaker by holding the Mode/Pair button until it flashes. Resetting the speaker by pressing the power button for 10 seconds can also resolve connectivity problems effectively.
8.3 Battery Not Charging
If the battery isn’t charging‚ ensure the speaker is properly connected to the charger and outlet. Check for damage to the USB cable or charging port. The red indicator light should glow during charging. If issues persist‚ reset the speaker by pressing the power button for 10 seconds. This often resolves charging-related problems effectively.

Additional Tips for Optimal Use
Regularly clean the speaker to maintain sound quality. Check for firmware updates to ensure optimal performance. Use the AUX and USB ports for alternative music sources.
9.1 Caring for Your Speaker
Clean the speaker regularly with a soft cloth to avoid dust buildup. Avoid exposing it to moisture or extreme temperatures. Store it in a dry‚ cool place when not in use. Use a mild detergent for stubborn stains‚ but avoid harsh chemicals. Ensure the speaker is completely dry before turning it on. Regularly check for firmware updates to maintain optimal performance.
9.2 Updating Firmware
To ensure optimal performance‚ regularly update your speaker’s firmware. Visit the Vivitar website for the latest software version. Download the update file to your computer‚ then transfer it to the speaker via USB. Follow the manual’s instructions to complete the update. Updating firmware enhances features‚ fixes bugs‚ and improves compatibility with devices. Always backup settings before updating.
9.3 Maximizing Battery Life
To extend your speaker’s battery life‚ avoid extreme temperatures and store it in a cool‚ dry place. Use the provided USB cable for charging to prevent damage. Keep the speaker away from water and moisture. Charge the battery fully before long-term storage. Regular firmware updates also help optimize battery performance. Refer to the manual for specific care instructions.